

A slot without a custom template uses the built-in design. That way your store picks up future improvements to every slot you have not changed.
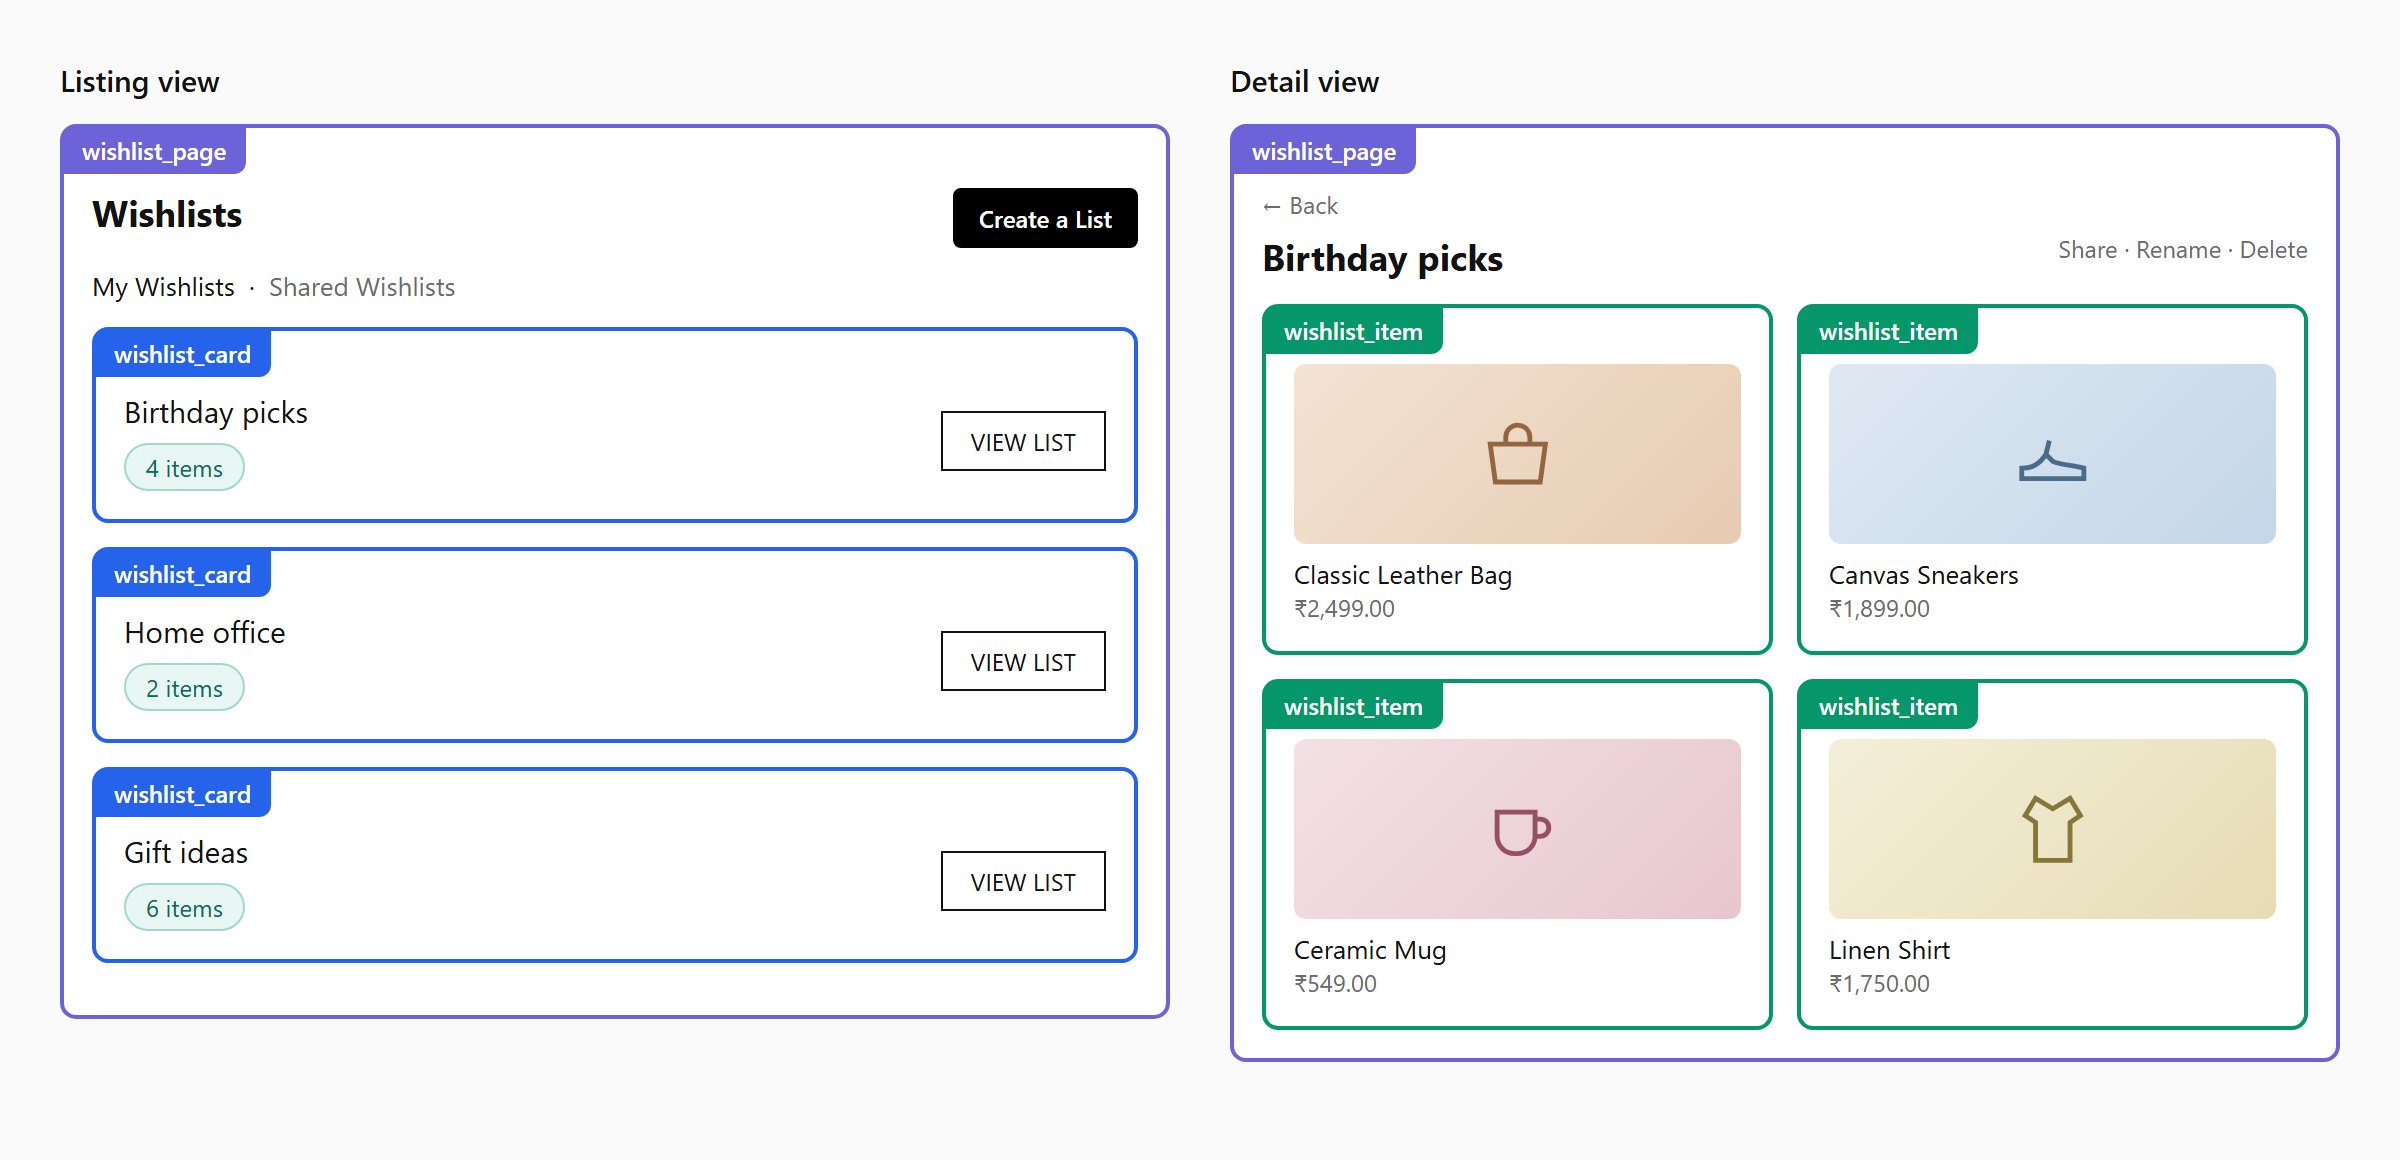
Where each template slot is used on the page
Workflow
1
Choose the fields you need
Under Default settings → Fields to fetch, tick any extra product data your templates use (SKU, vendor, tags, metafields, …). The app fetches only what you tick, which keeps the page fast.
2
Edit a slot
Open a slot, switch to Code, and edit. The Available variables panel lists everything in the context. Use Preview to check the listing and detail views with sample data.
3
Pick a market (optional)
Under Market, keep — Default — to change the template for all markets, or pick a market to give it its own version. A market with no override uses the default.
4
Save draft, then Publish
Save draft keeps your work private. Publish makes it live. Use Restore a previous version to roll back.
Syntax
Templates use EJS:include is not supported.
Wishlist card
Product card
Context
All variables are read-only.string
my, shared_with_me or shared_by_mestring
listing or detailobject
{ domain, name, currency, moneyFormat }object
{ handle, id, isPrimary, country, language }object
{ id, firstName, lastName, fullName, isGuest }. The email is left out on purpose.object
Widget settings for the current language
function
Returns the translated text for a key, or the fallback.
object
{ wishlistSharing, shareViaEmail }. Use it to hide features the store’s plan does not include.object
{ role, isOwner, canEdit, canMove, canShare, canSave, canManageShare, canGoBack }. role is owner, sharer or recipient.object
{ page, limit, totalItems, hasNextPage, nextPage }array
[{ key, label, current, shared }]object
array / object
Listing view and Wishlist card.
array / object
Detail view and Product card.Fields you tick under Fields to fetch are added too:
sku, compareAtPrice, vendor, productType, tags, selectedOptions, inventoryQuantity, priceRangeMax, description, seoTitle, seoDescription, collectionTitles, collectionHandles, collectionIds, images, publishedAt, productCreatedAt, totalInventory, category, status.Shared tabs only:
{ id, recipientName, recipientEmail, status, savedToWishlistName, isRevoked, isLinkShare }object
{ text, tone }, a notice the page wants to showRequired hooks
The app finds the parts of your markup throughdata-cb-* attributes. Your template must include the required ones, or the page cannot work.
- Wishlist Page
- Wishlist card
- Product card
Required:
data-cb-tabs, data-cb-region="<%= view %>", data-cb-list (the direct parent of the rows)Optional: data-cb-empty, data-cb-loadmore, data-cb-page-heading, data-cb-tab="<key>", data-cb-tab-count="<key>", data-cb-detail-header, data-cb-toggle="public", data-cb-public-label, data-cb-slot="badges|item-count-badge|products"Add the class cb-shared-tab to the shared tabs so the page can hide them when sharing is off.Actions
Putdata-cb-action on any clickable element. You do not need to write event handlers.
When the viewer lacks the permission, the app hides the element and removes its action, so a shared viewer can never delete someone else’s items.